Installation
We provide two ways to use eSCAPE from:
- the docker image or
- from a local install via setuptools.
Docker
If you like the live demo, you can install eSCAPE via Docker!
Docker is a type of lightweight virtualisation, and is the preferred method for eSCAPE usage on personal computers. You will first need to install Docker on your system, and then you may install eSCAPE via Docker.
Note
Docker may be driven from the command line, but new users may wish to use the Docker Kitematic GUI instead for ease.
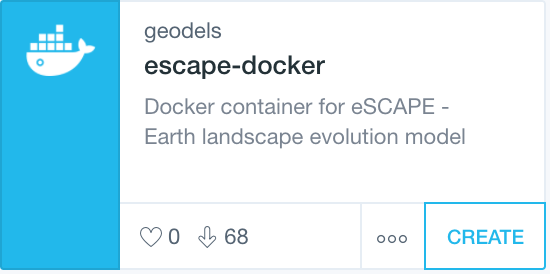
Simply search for escape-docker within Kitematic, and then click ‘CREATE’ to launch a container. You will eventually wish to modify your container settings (again through Kitematic) to enable local folder volume mapping, which will allow you to access your local drives within your container.
For Linux users, and those who prefer the command line, the following minimal command should be sufficient to access the badlands Jupyter Notebook examples:
docker pull geodels/escape-docker
Once downloaded you will now be able to run eSCAPE locally.
Important
You only need to pull the image once. Once it is installed you will only have to run the following command to start the code.
docker run -it -p 8888:8888 -v "$PWD":/live/share geodels/escape-docker
Navigate to localhost:8888 to see the notebooks.
This command will create a new container using the escape-docker image. Note that it will first check to see if the image exists locally, and otherwise will download a copy from the Docker Hub. This will only happen the first time you run the command; subsequent execution will use the downloaded image.
Once the new instance is created, eSCAPE image is launched within the container. Note that we also pass an option of the form -p host_port:docker_port which tells docker to perform a port mapping from the docker instance to the host. This allows us to use our native web browser to access the active docker notebook instance at http://localhost:8888/.
For interactive processes (like a shell), we must use -i -t together in order to allocate a tty for the container process. -i -t is often written -it as see in the command above.
Finally, the -v command or --volume=[host-src:]container-dest attach a volume or folder from the local computer to the container shared folder (here /live/share). The host-src is an absolute path or a name value and in the command above correspond to the place where the command is run from.
Tip
A step by step guide on how to use the eSCAPE docker image is provided here. 💣
Local installation
Below is a step by step guide to install eSCAPE on Linux system.
| Update your system and install default packages |
apt-get update -qq
apt-get install -yq --no-install-recommends bash-completion build-essential
apt-get install -yq --no-install-recommends python3-minimal python3-dev python3-pip
apt-get install -yq --no-install-recommends python3-tk python3-dbg cmake
apt-get install -yq --no-install-recommends python3-setuptools wget gfortran
| MPI |
MPICH_VERSION="3.3"
MPICH_CONFIGURE_OPTIONS="--enable-fast=all,O3 --prefix=/opt/mpich"
MPICH_MAKE_OPTIONS="-j4"
mkdir /tmp/mpich-build
wget http://www.mpich.org/static/downloads/${MPICH_VERSION}/mpich-${MPICH_VERSION}.tar.gz
tar xvzf mpich-${MPICH_VERSION}.tar.gz
cd mpich-${MPICH_VERSION}
./configure ${MPICH_CONFIGURE_OPTIONS}
make ${MPICH_MAKE_OPTIONS}
make install
ldconfig
cd /tmp
rm -fr *

export MPI_DIR=/opt/mpich
export PATH=${MPI_DIR}/bin:$PATH
| PIP installation |
pip3 install -U setuptools
pip3 install -U wheel
pip3 install --no-cache-dir numpy jupyter ipython plotly
pip3 install --no-cache-dir matplotlib ipython scipy
MPICC=${MPI_DIR}/mpicc MPICXX=${MPI_DIR}/mpicxx MPIFC=${MPI_DIR}/mpifort pip3 install --no-cache-dir mpi4py
| PETSC |
mkdir /tmp/petsc-build
export PETSC_VERSION="3.11.2"
wget http://ftp.mcs.anl.gov/pub/petsc/release-snapshots/petsc-lite-${PETSC_VERSION}.tar.gz
tar zxf petsc-lite-${PETSC_VERSION}.tar.gz && cd petsc-${PETSC_VERSION}
Configure:
./configure --with-debugging=0 --prefix=/opt/petsc
        --COPTFLAGS="-g -O3" --CXXOPTFLAGS="-g -O3" --FOPTFLAGS="-g -O3"
        --with-zlib=1
        --download-fblaslapack=1
        --download-ctetgen=1
        --download-triangle=1
        --download-hdf5=1
        --download-mumps=1
        --download-parmetis=1
        --download-metis=1
        --download-hypre=1
        --download-scalapack=1
        --useThreads=1
        --with-shared-libraries
        --with-cxx-dialect=C++11
Install:
make PETSC_DIR=/tmp/petsc-build/petsc-${PETSC_VERSION} PETSC_ARCH=arch-linux-c-opt all
make PETSC_DIR=/tmp/petsc-build/petsc-${PETSC_VERSION} PETSC_ARCH=arch-linux-c-opt install
make PETSC_DIR=/opt/petsc PETSC_ARCH="" test
Clean:
cd /tmp
rm -fr *
export PETSC_DIR=/opt/petsc
export PATH=${PETSC_DIR}/bin:$PATH
| Additional dependencies for eSCAPE |
First HDF5 and PETSC4PY
export PYTHONPATH=$PYTHONPATH:/usr/lib
CC=h5pcc HDF5_MPI="ON" HDF5_DIR=${PETSC_DIR} python3 -m pip install --no-cache-dir --no-binary=h5py h5py python3 -m pip install --no-cache-dir petsc4py
Fillit
mkdir /workspace/lib
export F90=gfortran
git clone -b python3 https://github.com/Geodels/fillit.git
cd fillit
python3 setup.py install
and using pip:
pip3 install pandas meshio rasterio meshplex ruamel.yaml
| Install eSCAPE |
cd /workspace/lib
git clone -b petsc3.11.2 https://github.com/Geodels/eSCAPE.git
cd eSCAPE
export F90=gfortran
export PETSC_DIR=/opt/petsc
export PETSC_ARCH=arch-linux-c-opt
python setup.py install
cd ..
Install eSCAPE-demo
cd examples
git clone -b petsc3.11.2 https://github.com/Geodels/eSCAPE-demo.git
| Notebook packages |
To run eSCAPE-demo and build the triangular meshes required by eSCAPE several packages are needed:
apt-get update -qq
apt-get install -yq --no-install-recommends gmsh python3-gdal gdal-bin
apt-get install -yq --no-install-recommends libgeos++ libgeos-dev libgdal-dev libproj-dev
and
pip3 install setuptools wheel
pip3 install pathlib shapely descartes geopy pygeotools pygmsh stripy
GMT color scale…
git clone https://github.com/j08lue/pycpt.git
cd pycpt
git checkout b45f720d09da79bcd567c5cbba9a554b0a7cc1d9
python3 setup.py install
cd ..
rm -rf pycpt
HPC installation
List of required compilers
The HPC installation has been tested with both GNU fortran compiler (5.4.0) and Intel-mkl ifort (18.0.1) compiler.
Important
major.minor versions of Python - eSCAPE is compatible with Python version (2.7.x, 3.5.x and above). Python version 2.7.15 has been tested on HPC.
| Dependencies |
Before you begin compiling eSCAPE and its dependencies, make sure you have set up your computer environment to include Python (2.7 and above), MPI implementation and a supported fortran compiler (gfortran and ifort have been tested).
Warning
eSCAPE requires the PETSc library and petsc4py package. On HPC platforms, the PETSc library is often a default module. If this is not the case you can follow the guide provided in the local installation page.
You will then need to have several other dependencies installed as pip packages. You can check which of them will need to be installed by opening a Python kernel and performing the following set of commands:
import numpy
import pandas
import scipy
from mpi4py import MPI
from petsc4py import PETSc
import ruamel.yaml as yaml
import meshio
If some of these packages are not installed you can install them via pip:
pip install XXX [--user]
where XXX is the missing package.
For petsc4py it is necessary to set the environment variables PETSC_DIR and PETSC_ARCH to their appropriate values (which will depend on your HPC installation):
export PETSC_DIR=\path\to\petsc\location
export PETSC_ARCH=petsc-arch-values
pip install [--user] petsc4py
| Custom packages |
Two additional packages are required prior to eSCAPE installation:
meshplexfillit
The meshplex package could be installed with pip:
pip install [--user] meshplex
In case you encounter some difficulties during installation related to fastfunc dependency, one can used the following forked version:
git clone https://github.com/Geodels/meshplex.git
cd meshplex
python setup.py install [--user]
cd ..
And fillit is installed using the following set of commands:
export F90=fortran-compiler
git clone https://github.com/Geodels/fillit.git
cd fillit
python setup.py install [--user]
where fortran-compiler needs to be replaced with the fortran compiler used to build PETSC (this will depend of the HPC installation but will likely be gfortran or ifort)
| eSCAPE |
OK, now that all dependencies are installed we can finally proceed with eSCAPE:
git clone https://github.com/Geodels/eSCAPE.git
cd eSCAPE
python setup.py install [--user]
| Testing installation |
You can then do a simple test to check that all packages have been successfully installed by starting a python kernel and importing each module individually:
import numpy
import pandas
import scipy
from mpi4py import MPI
from petsc4py import PETSc
import ruamel.yaml as yaml
import meshio
import meshplex
import fillit
import eSCAPE
| Example of installation on HPC platform |
USyD Artemis HPC
module purge
module load python/2.7.15-intel petsc-intel-mpi hdf5
export F90=ifort
git clone https://github.com/Geodels/fillit.git
cd fillit
python setup.py install --user

git clone https://github.com/Geodels/eSCAPE.git
cd eSCAPE
python setup.py install --user